Hey there! As a pump impeller supplier, I've seen firsthand how important it is to know how to replace a pump impeller. Whether you're a DIY enthusiast or a professional in the field, this guide will walk you through the process step by step.
Why Replace a Pump Impeller?
Before we get into the nitty - gritty of replacement, let's talk about why you might need to do it. Over time, pump impellers can wear out due to constant use, corrosion, or damage from debris in the fluid being pumped. A worn - out impeller can lead to reduced pump efficiency, decreased flow rate, and even complete pump failure. So, replacing it in a timely manner can save you a lot of headaches and money in the long run.
Tools You'll Need
First things first, gather the necessary tools. You'll typically need a set of wrenches (both adjustable and socket wrenches), a screwdriver (both flat - head and Phillips - head, depending on your pump), a puller (this is crucial for removing the old impeller), a torque wrench (to ensure proper tightening), and some lubricant (like silicone grease) for the new impeller.
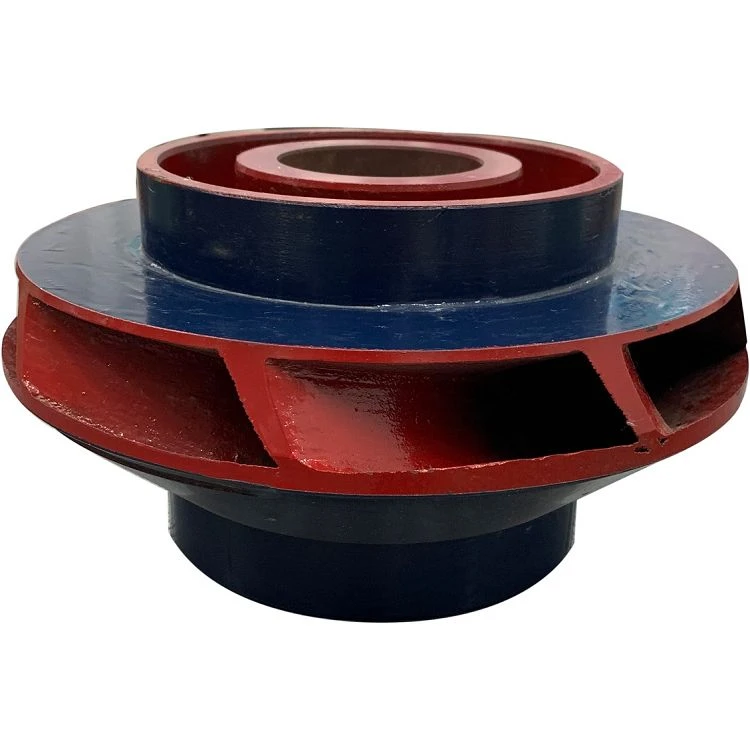
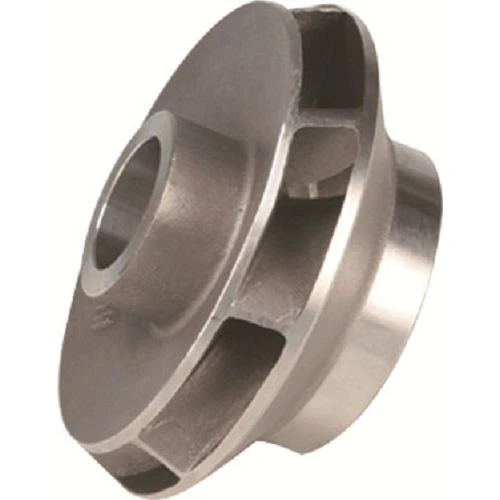
Step 1: Safety First
Safety should always be your top priority. Before you start working on the pump, make sure it's completely turned off and disconnected from the power source. If the pump is part of a larger system, isolate it to prevent any accidental startup. Also, wear appropriate safety gear such as gloves and safety glasses to protect yourself from any sharp edges or debris.
Step 2: Drain the Pump
If the pump is filled with fluid, you'll need to drain it. Locate the drain plug or valve on the pump and open it. Place a container underneath to catch the fluid. Make sure to follow proper disposal procedures for the fluid, especially if it's a hazardous substance.
Step 3: Remove the Pump Cover
Using your screwdriver or wrench, remove the bolts or screws holding the pump cover in place. Carefully lift off the cover and set it aside. Be gentle as you do this to avoid damaging any gaskets or seals.
Step 4: Remove the Old Impeller
This is where the puller comes in handy. Attach the puller to the old impeller according to the manufacturer's instructions. Slowly tighten the puller until the impeller starts to come loose. It might take a bit of force, but be patient and keep applying pressure evenly. Once the impeller is free, carefully remove it from the pump shaft.
Step 5: Inspect the Pump Shaft and Housing
With the old impeller removed, take a close look at the pump shaft and housing. Check for any signs of damage, such as scratches, corrosion, or wear. If you notice any issues, you might need to address them before installing the new impeller. For example, if the shaft is scratched, you can use emery cloth to smooth it out.
Step 6: Choose the Right Replacement Impeller
As a pump impeller supplier, I can tell you that choosing the right impeller is crucial. You need to consider factors like the pump's make and model, the flow rate requirements, and the type of fluid being pumped. We offer a variety of impellers, including Stainless Steel Pump Impeller, Bronze Pump Impeller, and Cast Iron Pump Impeller. Each material has its own advantages, so make sure to pick the one that best suits your needs.
Step 7: Install the New Impeller
Before installing the new impeller, apply a thin layer of lubricant to the pump shaft. This will make it easier to slide the impeller into place and also help prevent corrosion. Carefully slide the new impeller onto the shaft, making sure it's properly aligned. Use a torque wrench to tighten the impeller nut or bolt to the manufacturer's recommended torque specification. Over - tightening can damage the impeller or the shaft, while under - tightening can cause the impeller to come loose during operation.
Step 8: Reassemble the Pump
Once the new impeller is installed, it's time to put the pump back together. Replace the pump cover and tighten the bolts or screws. Make sure the gaskets or seals are in good condition and properly seated to prevent any leaks.
Step 9: Refill the Pump
If you drained the pump earlier, refill it with the appropriate fluid. Check for any leaks around the pump cover or connections. If you find any leaks, tighten the bolts or replace the gaskets as needed.
Step 10: Test the Pump
Finally, reconnect the pump to the power source and turn it on. Observe the pump's operation for a few minutes. Check the flow rate, pressure, and overall performance. If everything seems to be working fine, congratulations! You've successfully replaced the pump impeller.
Contact Us for Your Pump Impeller Needs
Replacing a pump impeller can be a bit of a challenge, but with the right tools and knowledge, it's definitely doable. If you're in the market for a high - quality pump impeller, we're here to help. As a trusted pump impeller supplier, we offer a wide range of impellers to meet your specific requirements. Whether you need a Stainless Steel Pump Impeller, Bronze Pump Impeller, or Cast Iron Pump Impeller, we've got you covered.
If you have any questions or need assistance in choosing the right impeller for your pump, don't hesitate to reach out. We're always happy to help you make the best decision for your pumping system.
References
- "Pump Handbook" by Igor J. Karassik et al.
- Manufacturer's manuals for various pump models.