Hey there! As a supplier of Pump Control Panel, I've seen firsthand how crucial it is to have a well - calibrated pump control panel. A properly calibrated panel ensures that your pumps operate efficiently, reduces the risk of breakdowns, and saves you money in the long run. In this blog, I'm gonna walk you through the steps on how to calibrate a pump control panel.
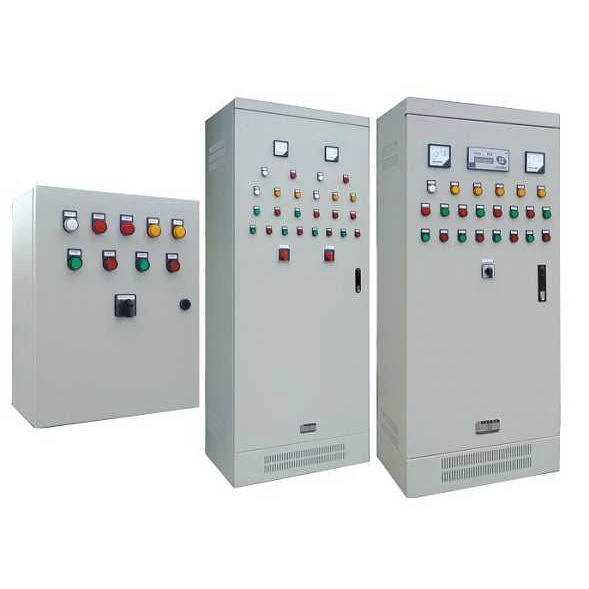
Step 1: Gather the Necessary Tools
Before you start the calibration process, you'll need to gather some tools. You'll typically need a multimeter to measure voltage, current, and resistance. A pressure gauge is also essential if your pump control panel is related to pressure - controlled systems. Additionally, you might need a screwdriver to open the panel and make any necessary adjustments. Make sure all your tools are in good working condition to get accurate readings.
Step 2: Familiarize Yourself with the Panel
Take a good look at the pump control panel. Read the manual if you have it. Understand the different components, such as relays, switches, and sensors. Each part plays a specific role in the operation of the panel. Identify the input and output terminals, as well as any adjustment knobs or potentiometers. Knowing your panel inside out will make the calibration process a lot easier.
Step 3: Check the Power Supply
The first thing you want to do is check the power supply to the pump control panel. Use your multimeter to measure the voltage at the input terminals. Make sure the voltage is within the specified range for the panel. If the voltage is too high or too low, it can cause the panel to malfunction. You might need to consult an electrician if you suspect there are issues with the power supply.
Step 4: Calibrate the Pressure Settings (if applicable)
If your pump control panel is pressure - controlled, you'll need to calibrate the pressure settings. Connect your pressure gauge to the system to get an accurate reading of the actual pressure. Then, adjust the pressure - sensing device on the panel. This could be a pressure switch or a pressure transducer. Use a small screwdriver to turn the adjustment screw on the pressure - sensing device until the panel's display or indicator matches the actual pressure reading on your gauge.
Step 5: Test the Overload Protection
Overload protection is a critical feature of a pump control panel. It prevents the pump from burning out due to excessive current. To test the overload protection, you can gradually increase the load on the pump while monitoring the current with your multimeter. When the current reaches the overload setting, the overload protection should trip and cut off the power to the pump. If it doesn't, you'll need to adjust the overload setting on the panel. This usually involves turning a potentiometer or adjusting a dial.
Step 6: Check the Timer Settings (if applicable)
Some pump control panels have timer settings that allow you to control when the pump turns on and off. If your panel has this feature, check the timer settings. You can use a stopwatch to verify the accuracy of the on - and off - times. If the times are off, you can adjust the timer using the controls on the panel. Make sure to set the timer according to your specific requirements, such as the time of day when you need the pump to operate.
Step 7: Verify the Alarm Settings
Most pump control panels come with alarm systems that alert you when there's a problem. Check the alarm settings to make sure they're working correctly. You can simulate different fault conditions, such as low pressure or high current, and see if the alarm goes off. If the alarm doesn't work, check the alarm circuit and make any necessary adjustments. This might involve checking the connections, replacing a faulty sensor, or adjusting the alarm threshold.
Step 8: Document the Calibration
Once you've completed the calibration process, it's important to document the results. Write down the settings you've adjusted, the readings you've taken, and any observations you've made. This documentation will be useful for future reference, especially if you need to troubleshoot any issues or perform maintenance on the panel. You can also use it as proof of proper calibration if required.
Step 9: Conduct a Final Test
After documenting the calibration, conduct a final test of the pump control panel. Turn on the pump and let it run for a while. Monitor the system to make sure everything is working as expected. Check the pressure, current, and other parameters to ensure they're within the normal range. If you notice any problems, go back and re - check your calibration steps.
Why Choose Our Pump Control Panels?
At our company, we offer high - quality Pump Control Panel that are easy to calibrate. Our panels are designed with the latest technology and come with detailed manuals to guide you through the calibration process. We also provide excellent customer support, so if you have any questions or need further assistance, our team is always ready to help.
If you're in the market for a new pump control panel or need to replace an old one, we'd love to hear from you. Our panels are reliable, efficient, and cost - effective. Whether you're a small business owner or a large industrial operator, we have the right solution for you.
Conclusion
Calibrating a pump control panel might seem like a daunting task, but if you follow these steps, you'll be able to do it successfully. Remember to always prioritize safety and use the right tools. And if you ever need a new pump control panel or have any calibration - related questions, don't hesitate to reach out. We're here to make your pump operation as smooth as possible.
References
- Pump Control Panel Manufacturer's Manuals
- Electrical Engineering Handbooks
- Industry Standards for Pump Control Systems