Replacing a bronze pump impeller is a task that, while it may seem daunting at first, can be accomplished with the right knowledge and tools. As a supplier of high - quality Bronze Pump Impellers, I've witnessed firsthand the importance of a well - functioning impeller in a pump system. In this blog, I'll guide you through the process of replacing a bronze pump impeller, ensuring your pump operates at its best.
Why Replace a Bronze Pump Impeller?
Before delving into the replacement process, it's essential to understand why you might need to replace your bronze pump impeller. Over time, impellers can experience wear and tear due to factors such as corrosion, abrasion from the pumped fluid, and mechanical stress. A damaged or worn impeller can lead to reduced pump efficiency, increased energy consumption, and even complete pump failure. By replacing the impeller, you can restore the pump's performance and extend its lifespan.
Tools and Materials Needed
To replace a bronze pump impeller, you'll need the following tools and materials:
- Wrenches and Socket Set: Different sizes are required to remove bolts and nuts holding the pump casing and impeller in place.
- Screwdrivers: Both flat - head and Phillips - head screwdrivers may be needed to remove small screws or access certain parts of the pump.
- Puller: An impeller puller is crucial for safely removing the old impeller from the pump shaft without causing damage.
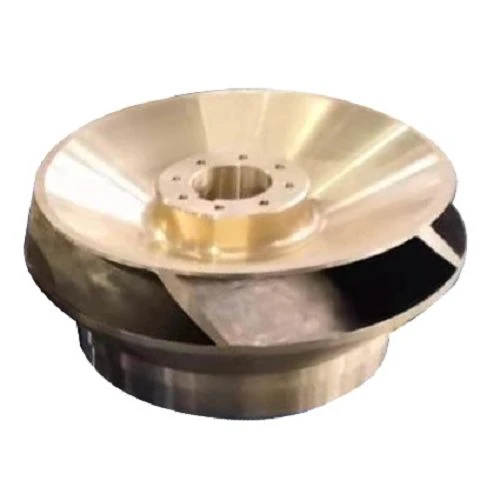
- New Bronze Pump Impeller: Ensure that the new impeller is the correct size and type for your pump. You can find a wide selection of Bronze Pump Impellers on our website.
- Gasket Sealant: This helps create a tight seal between the pump casing and other components, preventing leaks.
- Cleaning Supplies: Such as a wire brush and solvent, to clean the pump shaft and casing before installing the new impeller.
Step - by - Step Replacement Process
Step 1: Safety First
Before starting any work on the pump, make sure to turn off the power supply to prevent accidental startup. Also, relieve any pressure in the pump system by opening the appropriate valves. Wear safety goggles, gloves, and other protective gear to avoid injuries.
Step 2: Drain the Pump
Locate the drain valve on the pump and open it to drain the fluid from the pump. Place a suitable container beneath the drain valve to catch the fluid. This step is important to prevent spills and make the replacement process cleaner.
Step 3: Remove the Pump Casing
Use the appropriate wrenches and screwdrivers to remove the bolts and screws holding the pump casing in place. Carefully lift off the casing, taking note of the position of any gaskets or seals. Set the casing aside in a safe place.
Step 4: Inspect the Impeller
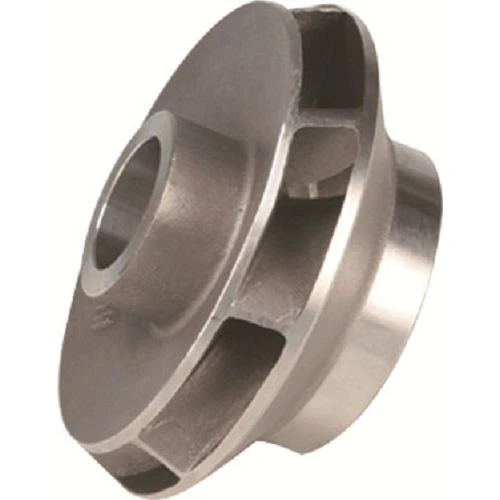
Once the casing is removed, you can access the impeller. Inspect the old impeller for signs of damage, such as cracks, chips, or excessive wear. If you notice any issues, it's definitely time to replace it.
Step 5: Remove the Old Impeller
Attach the impeller puller to the old impeller according to the manufacturer's instructions. Slowly tighten the puller to apply pressure and gradually remove the impeller from the pump shaft. Be patient and avoid using excessive force, as this could damage the shaft.
Step 6: Clean the Pump Shaft and Casing
Use a wire brush and solvent to clean the pump shaft and the inside of the casing. Remove any dirt, debris, or old gasket material. This will ensure a proper fit for the new impeller and prevent leaks.
Step 7: Install the New Impeller
Carefully slide the new Bronze Pump Impeller onto the pump shaft. Make sure it is properly aligned and seated correctly. You may need to use a mallet or a soft - faced hammer to gently tap the impeller into place, but be careful not to damage it.
Step 8: Reassemble the Pump
Apply a thin layer of gasket sealant to the gaskets or sealing surfaces. Place the pump casing back onto the pump body and secure it with the bolts and screws. Tighten them evenly to ensure a proper seal.
Step 9: Refill the Pump
Close the drain valve and refill the pump with the appropriate fluid. Check for any leaks around the casing and connections.
Step 10: Test the Pump
Turn on the power supply and start the pump. Monitor the pump's operation for a few minutes. Check for proper flow, pressure, and any unusual noises. If everything seems normal, the replacement was successful.
Comparison with Other Types of Pump Impellers
While bronze pump impellers are popular for their corrosion resistance and durability, there are other types of impellers available in the market.
Cast Iron Pump Impellers are known for their strength and affordability. They are suitable for applications where corrosion is not a major concern. However, they may be more prone to rusting in wet or corrosive environments compared to bronze impellers.
Stainless Steel Pump Impellers offer excellent corrosion resistance and are often used in applications where the pumped fluid is highly corrosive. They are more expensive than cast iron impellers but can provide long - term reliability in harsh conditions.
Conclusion
Replacing a bronze pump impeller is a manageable task if you follow the right steps and use the appropriate tools. By ensuring that your pump has a properly functioning impeller, you can maintain its efficiency and performance. As a leading supplier of Bronze Pump Impellers, we are committed to providing high - quality products to meet your needs.
If you're in the market for a new bronze pump impeller or have any questions about the replacement process, don't hesitate to reach out to us. We're here to assist you with your pump impeller needs and can provide expert advice to ensure you make the right choice for your pump system.
References
- "Pump Handbook" by Igor J. Karassik et al.
- Manufacturer's manuals for pumps and impellers.